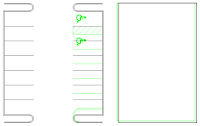
When working on commercial development projects one thing is for certain, site layouts change. I had the daunting task of creating an exhibit that shows the difference between the 1st site layout vs. the final layout. I started out by using xref overlays and changing colors to see any discrepancies. After panning around looking for an hour I knew there had to be a better way.
That better way is
Autodesk Design Review 2009. It's Free.
You don't have to register. There's a link on the top of the form to skip it.
Here are the steps to compare two drawings (dwg):- Open the 1st drawing.
- Plot to a dwf file using "DWF6ePlot.pc3" driver.
(If you don't have it in your plotter list then search for it under the directory C:\Documents and Settings\"Your Login User Name"\. You will need to copy the .pc3 file into your plotter directory. AutoCAD Menu: File > Plotter Manager... will open it in windows explorer.)
- Use a logical name like "OriginalSiteLayout.dwf"
- Repeat for the 2nd drawing.
- Use a logical name like "FinalSiteLayout.dwf"
Here's the kicker! You must use the same plot area with the same pen file. Using window helps.
Tip: Use the thinnest pens you have. You'll get better results.
- Open the 1st dwf file in Design Review.
- Menu: Tools > Compare...
- Press Browse... and select the 2nd dwf file.
- Press Options (Bottom Left Corner) for Color options. Note colors or change them if desired.
- Press OK then OK once more.
Note that you have now made a change to the 1st dwf file opened. Make a backup prior if you wish or SaveAs at this point.

I used this comparison file to quickly identify the areas that changed. I still used the Xref overlay for plotting purposes but at least this gave me an idea of exactly where to look.
I inserted the comparison dwf file in my drawing but it didn't show the compared geometry (2nd dwg file). If you know how to do that feel free to comment. I will update this post if I find a solution. I suppose you can underlay both the 1st and 2nd dwf file but you wouldn't see the color comparison.
Hope this saves you some time!

